


Blog
Newborn Photo Editing Service
Posted on 3 Feb, 2021 by Sarah Hart
Use my photo editing skills!
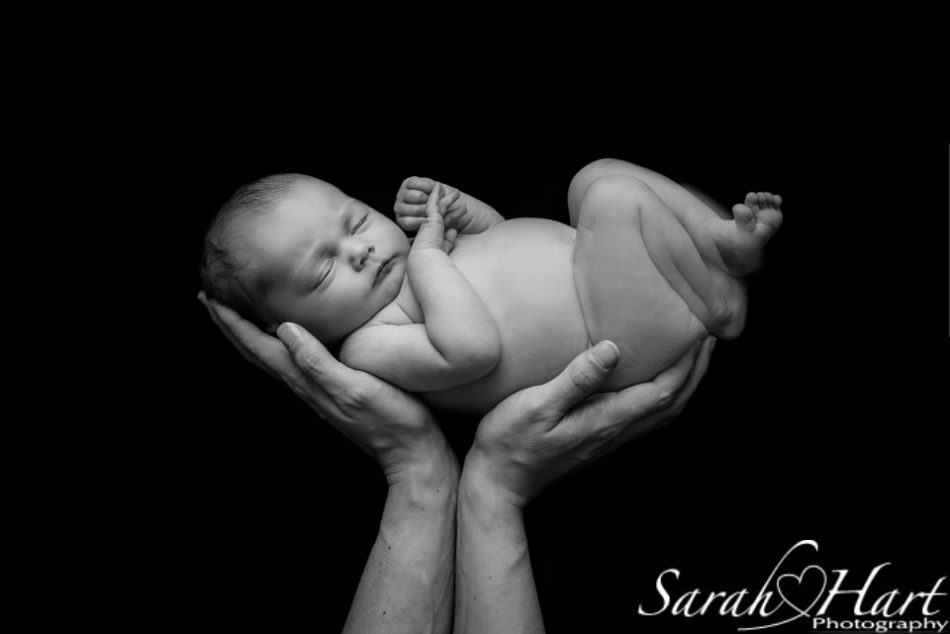
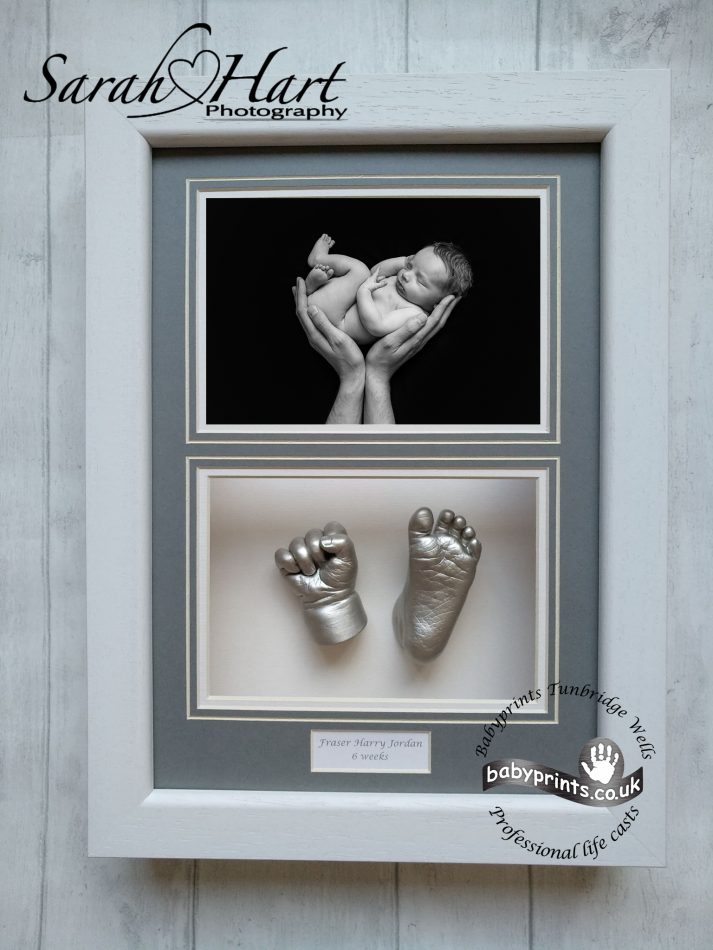
Sadly my little photography studio still remains closed due to the pandemic. However, I can still use my skills to offer a newborn photo editing service to any new parents whom are unable to have professional newborn photography at this time. Let me help you create a beautiful, timeless image of your tiny newborn and I’ll add my professional editing skill to improve the image you take. By using the instructions below and submitting your image to me, you will be returned with a stunning keepsake image of your little one at this precious time! Who wouldn’t want an image like the one below of their newborn baby?!
How much does the service cost?
For just £10, you can own a beautiful newborn portrait. All you have to do is follow my instructions below and take a photograph of your baby in either mum or dad’s hands. Then email the image to me at sarah@sarahhartphotography.com. I’ll then send an invoice for payment of £10 for my editing service. Upon receipt, I will then hand edit your image to produce a beautiful keepsake of your baby. I’ll convert the image to black and white and use my usual photo editing techniques for newborn portraits. Within a few days, your finished image will be emailed back to you.
How to take the photograph
The closer you follow, these instructions, the better the outcome for you, so do read through the instructions carefully. Use the best quality camera you own – a DSLR camera would be ideal but a decent camera on your mobile can work just as well.
Step 1 – light source
- Choose a window in your house. Lighting is key to all photography. I use a studio light but you can create the look with natural light coming through a window. You want to avoid direct sunlight on a sunny day – this will create harsh shadows on your baby. Ideally, you will need to find a large north-facing window in your house if possible. If you only have a large south facing window, then choose a day when it is cloudy. In fact a cloudy day is better in general to take the photograph on as the light will be softer.
Step 2 – something to lie on
- Find a beanbag or duvet for your baby to lie on. Yes, you read that correctly. This image may look like you have to hold your baby up in a parent’s hands but you don’t! In fact, I always lay the baby on a beanbag in my studio to create this newborn portrait! If your bean bag is quite soft, you may have to part kneel on it to make it a bit firmer. If you haven’t got a firm bean bag you can use a folded up duvet (perhaps fold up a single duvet in half, then half again). You just need something comfy for baby to slightly sink into and be comfy on.
Step 3 – a black or dark blanket
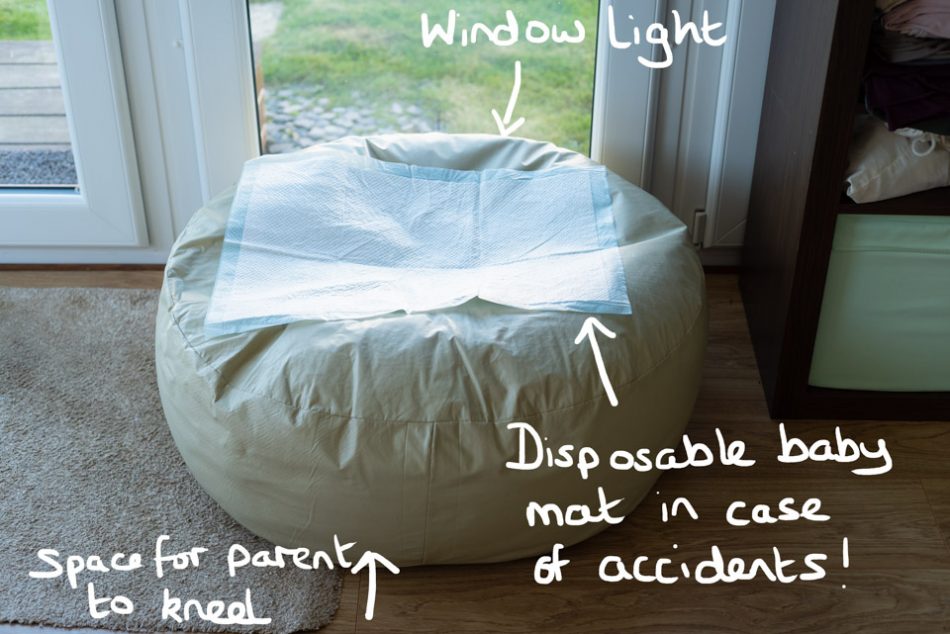
- Find a BLACK blanket/sheet/table cloth. If you haven’t got anything black, then find something as dark as possible – a dark grey/maroon/brown throw or blanket will work – the darker the better. You’re going to lay this over the beanbag/duvet. A big tip here, is to lay a disposable baby matt under the black cloth to soak up any accidents. I’d hate for any duvets or bean bags to be ruined by a wee or poo!
Step 4 – plan the pose before lying baby down
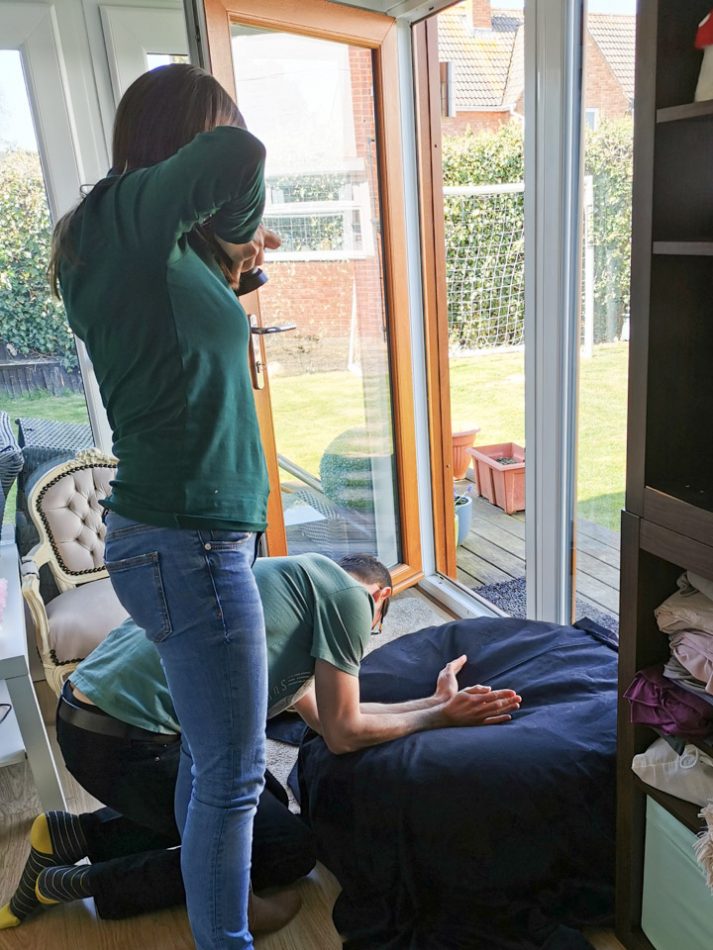
- Plan where baby will lay on the bean bag. Make a slight well in the beanbag/duvet. This where baby will lay. Ideally, you want the light to come down the baby’s head. Make sure your partner (or whoever will be using their hands in the image to hold the baby) has enough room to kneel (see photos at the end of this blog for the parents need to be)
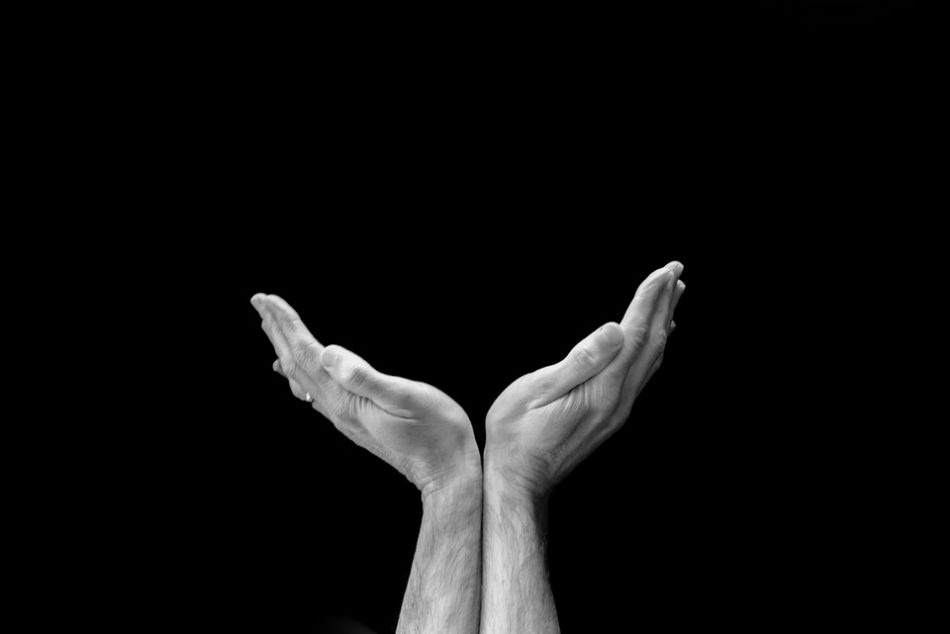
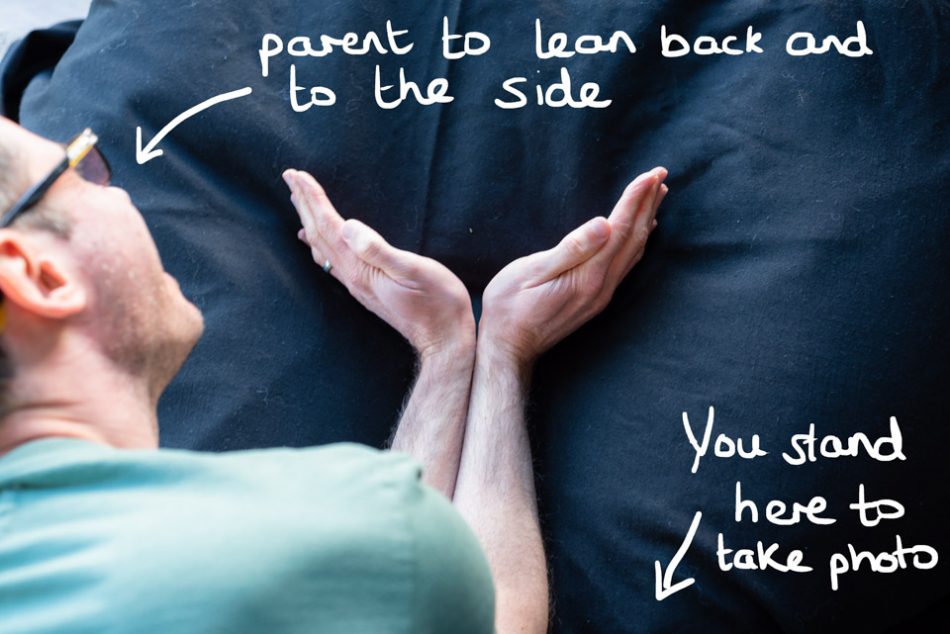
- Practice the shape of the hands. Decide on who will hold your baby. Dad’s hands are often bigger (and so make baby look smaller) but some men prefer to use their partner’s hands because mum’s arms tend to be less hairy! That’s a choice entirely down to you! Before you’re ready to lay your baby down, get the adult to practise making the shape seen in the picture below. They need to flex their hands back as much as they can and keep their wrists together. Remember to take off any watches or bracelets so as not to distract from the newborn’s portrait.
Step 5 – posing your newborn
- Ideally, your newborn will be asleep for this image. So pick a time in the day when they’re likely to be sleeping. A great time to choose is just after a feed. Before you feed your newborn, strip them down to just their nappy and keep them warm with a blanket wrapped round them. That way, when they’re fed and sleepy, all you’ll need to do is peel their nappy off to lie them down on the bean bag.
- Lie your newborn down on their side and let them curl up. The best images, are those where baby is relaxed and curled up. Make sure the parent’s hands are nice and warm (cold hands will unsettle your baby). Scoop the parent’s hands around your baby’s back. Try to ensure that the fingers reach to the back of the baby’s head – this will make it look like your newborn’s head is being supported in the parent’s hands.
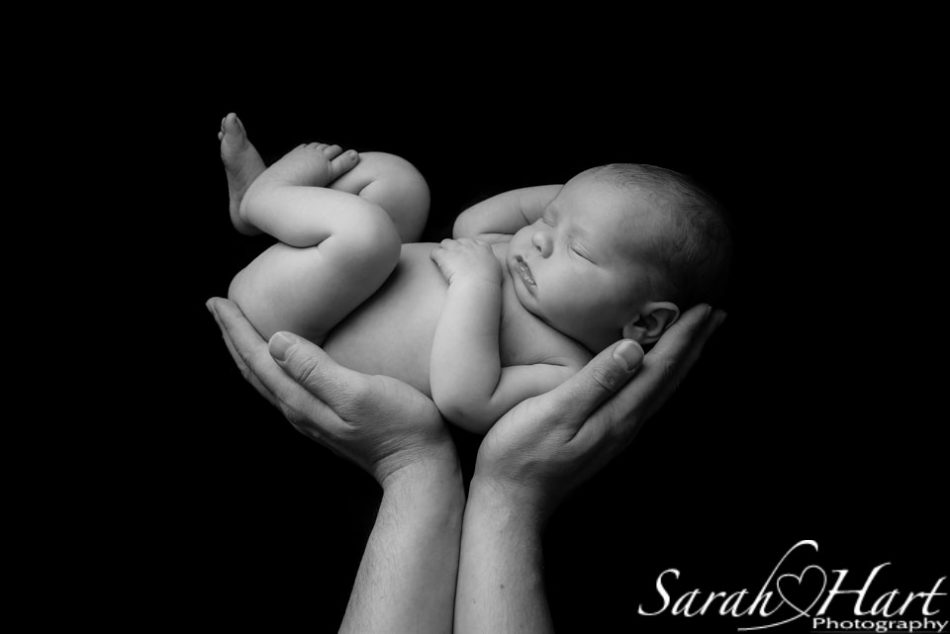
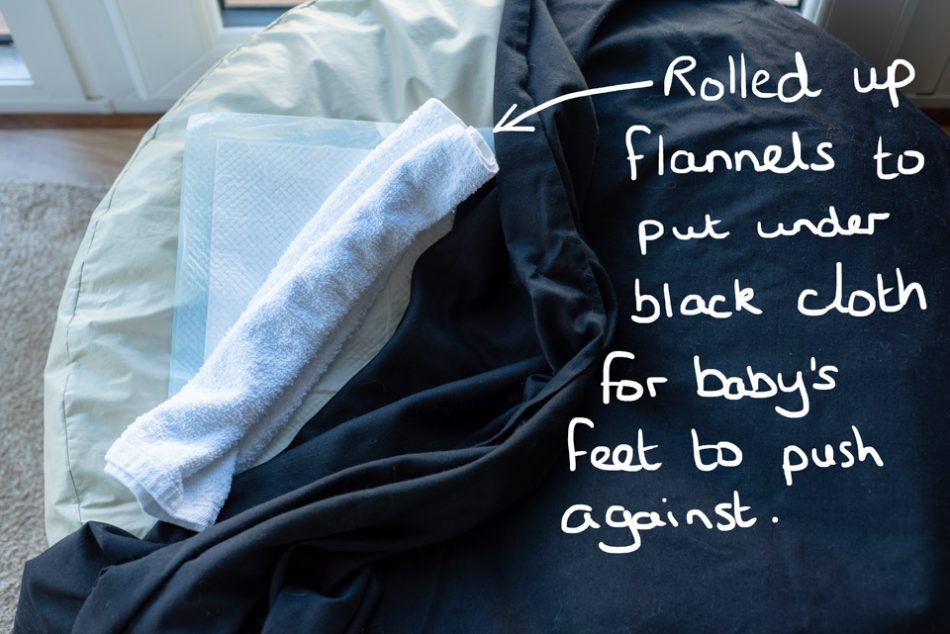
- Tuck baby’s feet in. Sometimes, baby’s feet will spring out. If at all possible, the parent’s hands might be able to help keep their baby’s feet down. Or another tip, place rolled up cloths/towels under the black cloth against where baby’s feet are pressing to keep them tucked up.
- Turn your baby’s head towards you. Just very gently turn their face towards you so that you get less of their profile and more of their face in the picture.

- Get the parent holding the baby to slightly lean back and to the side out of the way. This will mean you can stand next to them and take the photo over their shoulder. You want to aim to get only the parent’s forearms and your baby in the shot. Hold the camera steady to take the photo so you don’t get any camera blur. Try to keep the camera’s focus on your baby’s eye.
And that’s it! Yes, I make it look easy….I’ve been a newborn photographer for over 7 years now so I’m experienced in creating this shot. But I’m very happy for you to have a practise first and submit and image. I’ll offer advice on how to improve the shot for you before I use my photo editing magic!
Get in touch!
If you’re keen to try my newborn photo editing service and create this keepsake portrait image of your newborn, get in touch. You can drop me an email at sarah@sarahhartphotography.com with either the image you’ve taken using my instructions, or any questions you might have. Can’t wait to create something special with you!
For more help on taking your own images of your newborn at home, read this blog: https://sarahhartphotography.com/photographing-a-newborn-at-home/
I’m also available to help with framing your image should you wish. Plus if you also use the services of Christine Sharman at Baby Prints Tunbridge Wells, she’ll produce beautiful castings of your baby’s hands and feet to frame with your image.
Posts...
- Father’s Day Mini Sessions 2026 – update those family portraits!12 May, 2026
- Gorgeous Spring Photography Mini Sessions18 Mar, 2026
- A Portrait With Mum Mini Sessions 2026 – Kent Family Photographer26 Jan, 2026
- Christmas Mini Photoshoots 202510 Sep, 2025
- Hoppy Celebrations: A Peter Rabbit Cake Smash🐰15 Jul, 2025
- Memorable Starting School Photos7 Jul, 2025
- A Portrait With Mum Mini Sessions 2025 – Kent Family Photographer20 Jan, 2025
- Christmas Mini Photoshoots 20244 Sep, 2024
- Spring Theme Mini Shoots21 May, 2024
- 5 Reasons Why Professional Headshots Are Important3 May, 2024

Specialising in Newborn Photography